Guides & Tips
Collaborate Like A Boss
Sending Files
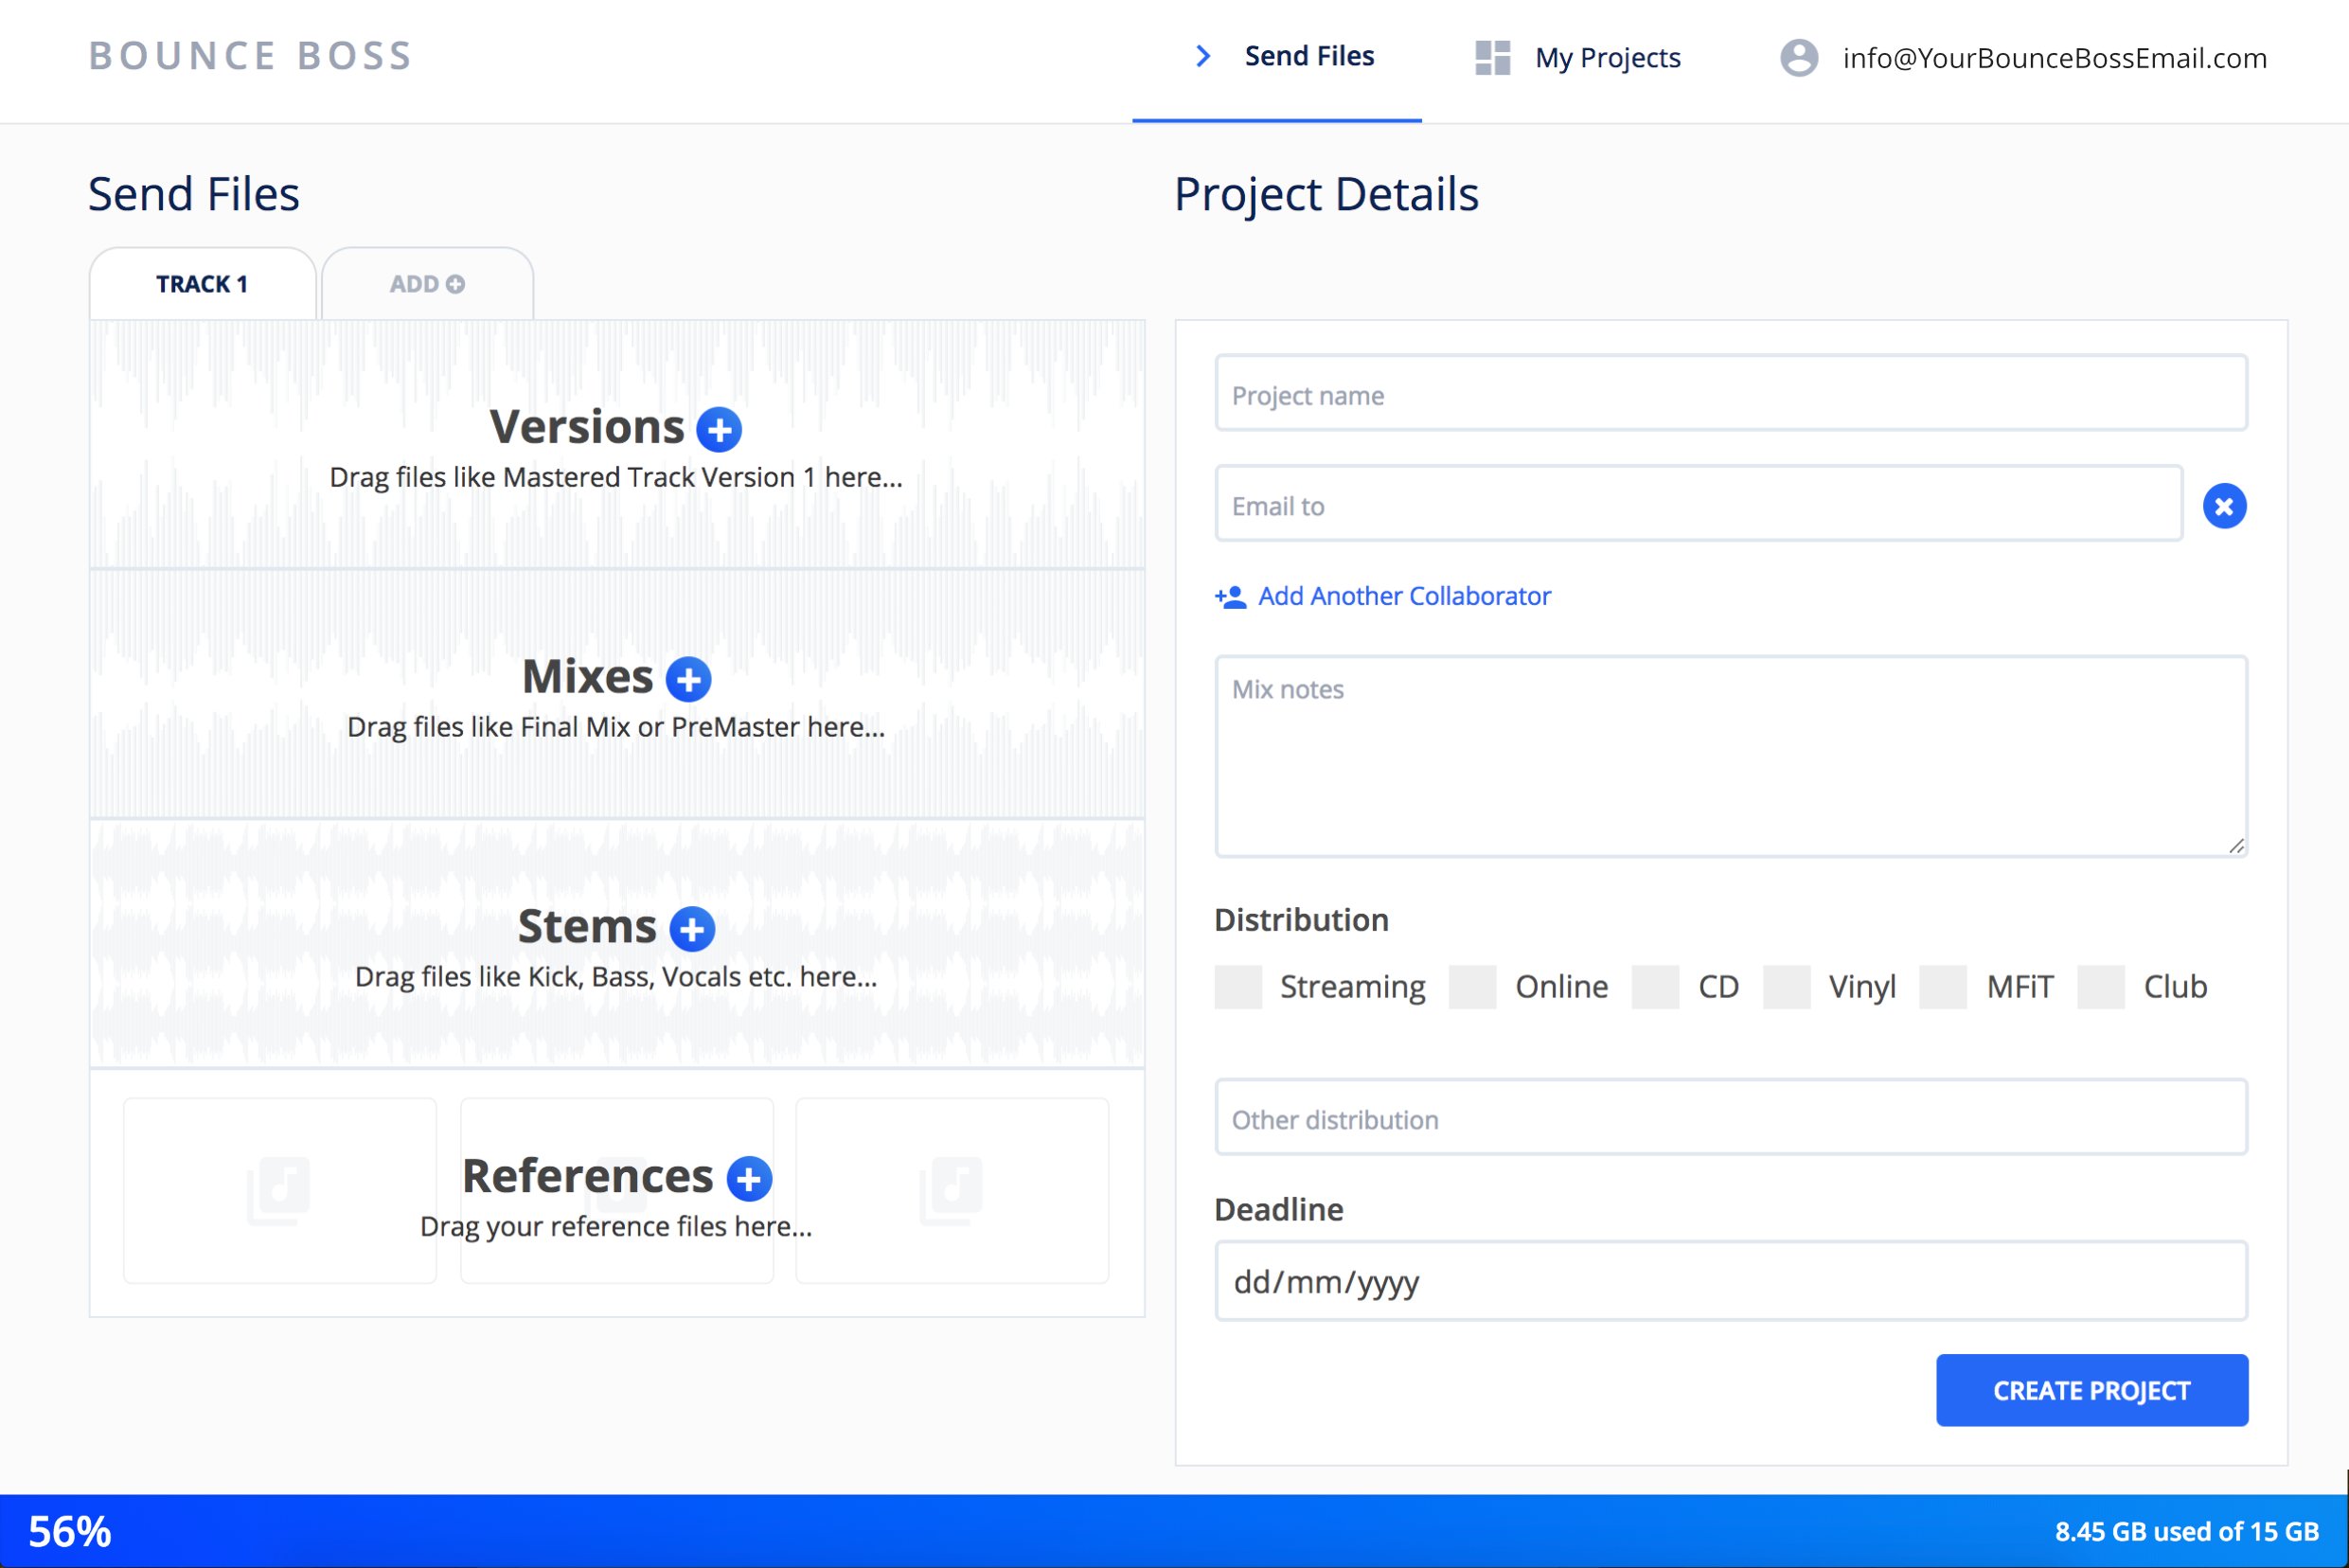
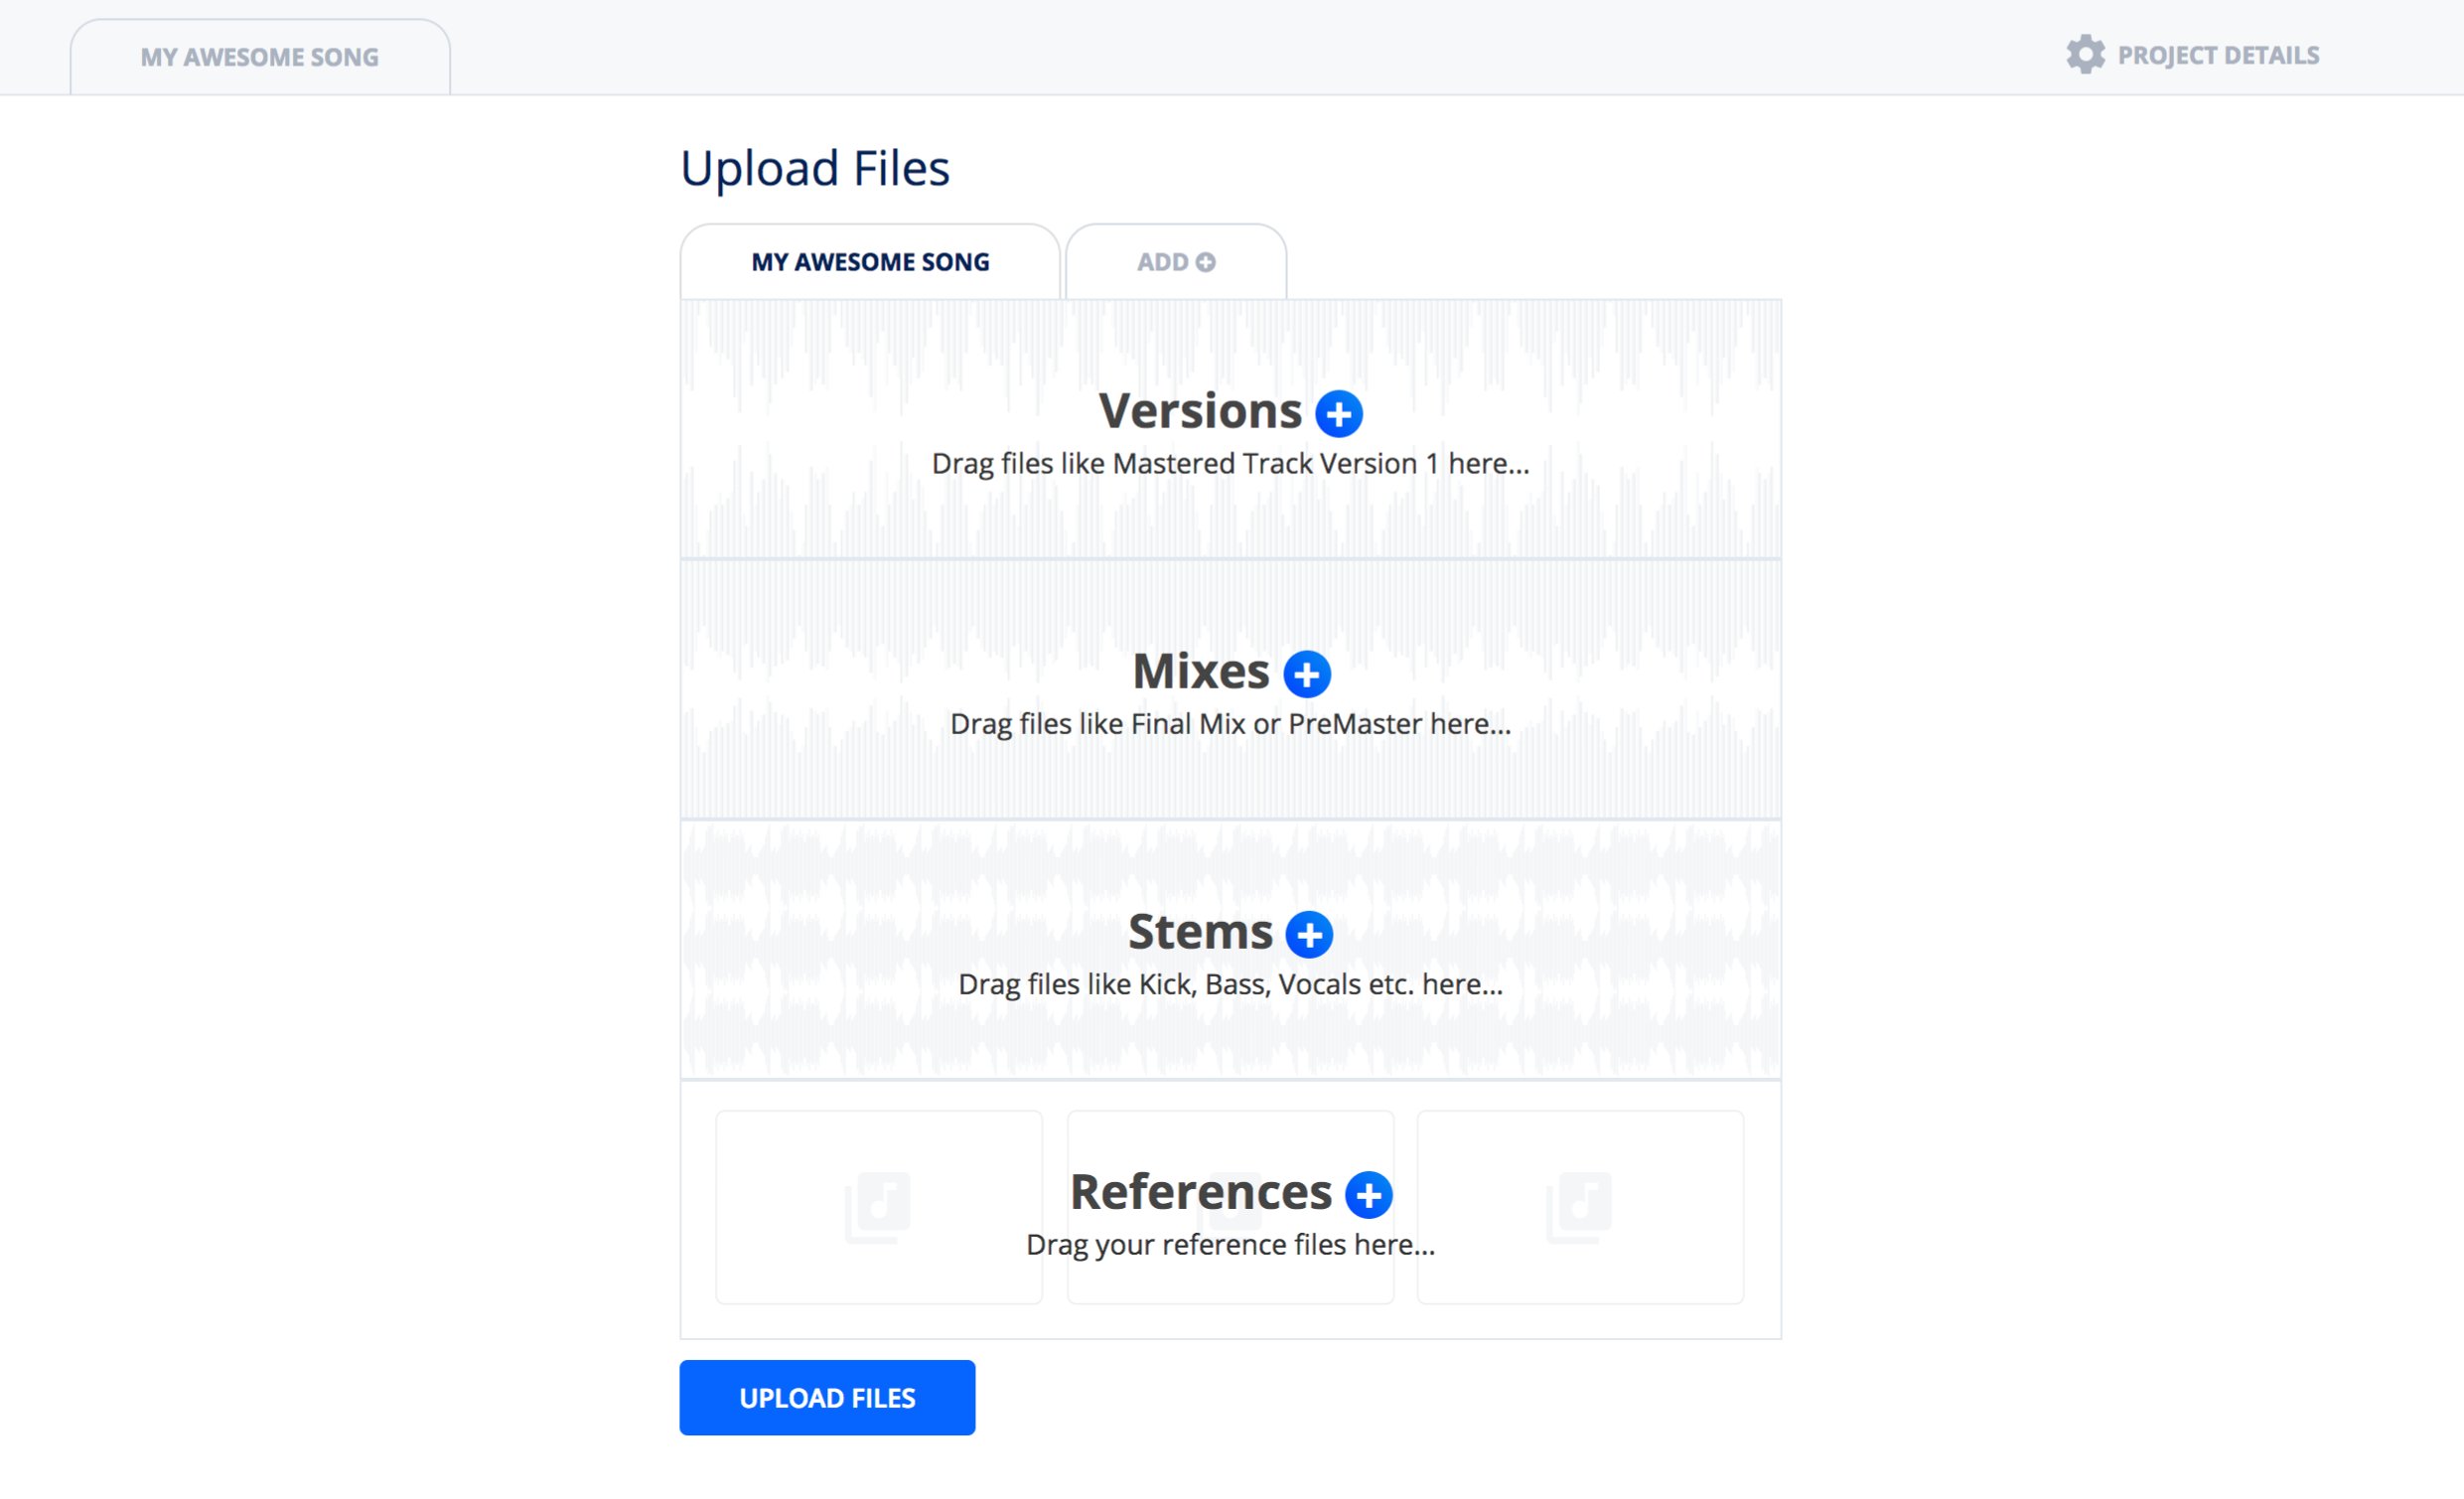
Even the most complicated projects become perfectly organized and easy to handle with Bounce Boss. The ‘Create Project’ page allows you to create the different tracks in the project and upload masters, mixes, stems, and references that relate specifically to each track. You can also fill in all the necessary details for a successful project such as mix notes, distribution and deadline.
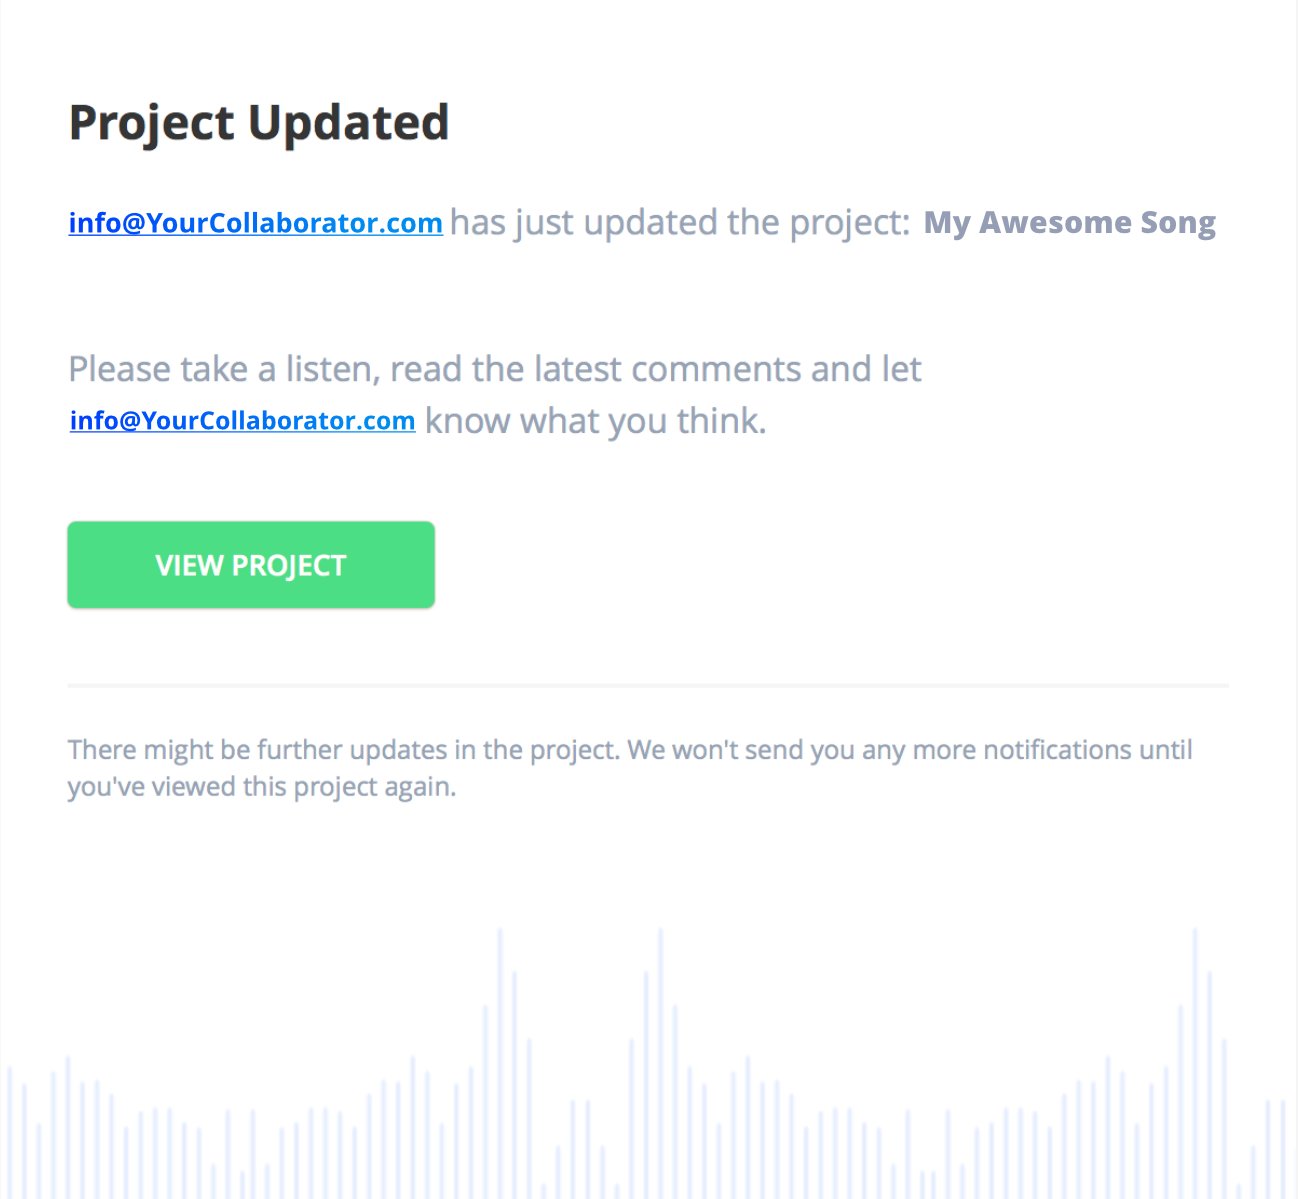
Sending files only takes a minute. From this one simple step, Bounce Boss organizes and creates your project, then notifies your collaborator with a professional invitation to collaborate. Your collaborator will even see a waveform visual of the file you uploaded in the email itself!
Pro Tip: The project name automatically updates to the name of the file you upload. You can edit this if needed. If you name your files correctly this is another 10 seconds saved on every project.
Switching Between Tracks
We asked over 300 producers “ When collaborating on a project, roughly how many masters do you create and share before a project is finished? ” It turns out over 90% of projects have 3 or more masters created before the project is finished, with 12.3% saying they created 11 or more masters before finishing the project.
When you’re working with this many files, you want to be certain that the project is headed in the right direction. With Bounce Boss, you can easily jump between the different masters and compare how the sound has evolved and hopefully improved as the project has progressed. Being able to compare to a reference track gives you peace of mind that your music will be sonically comparable to commercially successful tracks when you release it.

Pro Tip: You can click on the buttons or use the keyboard shortcuts S, R, M, V (stems, references, mixes, masters) together with the number keys 1-9 to navigate these items quickly.
Looping The Waveform
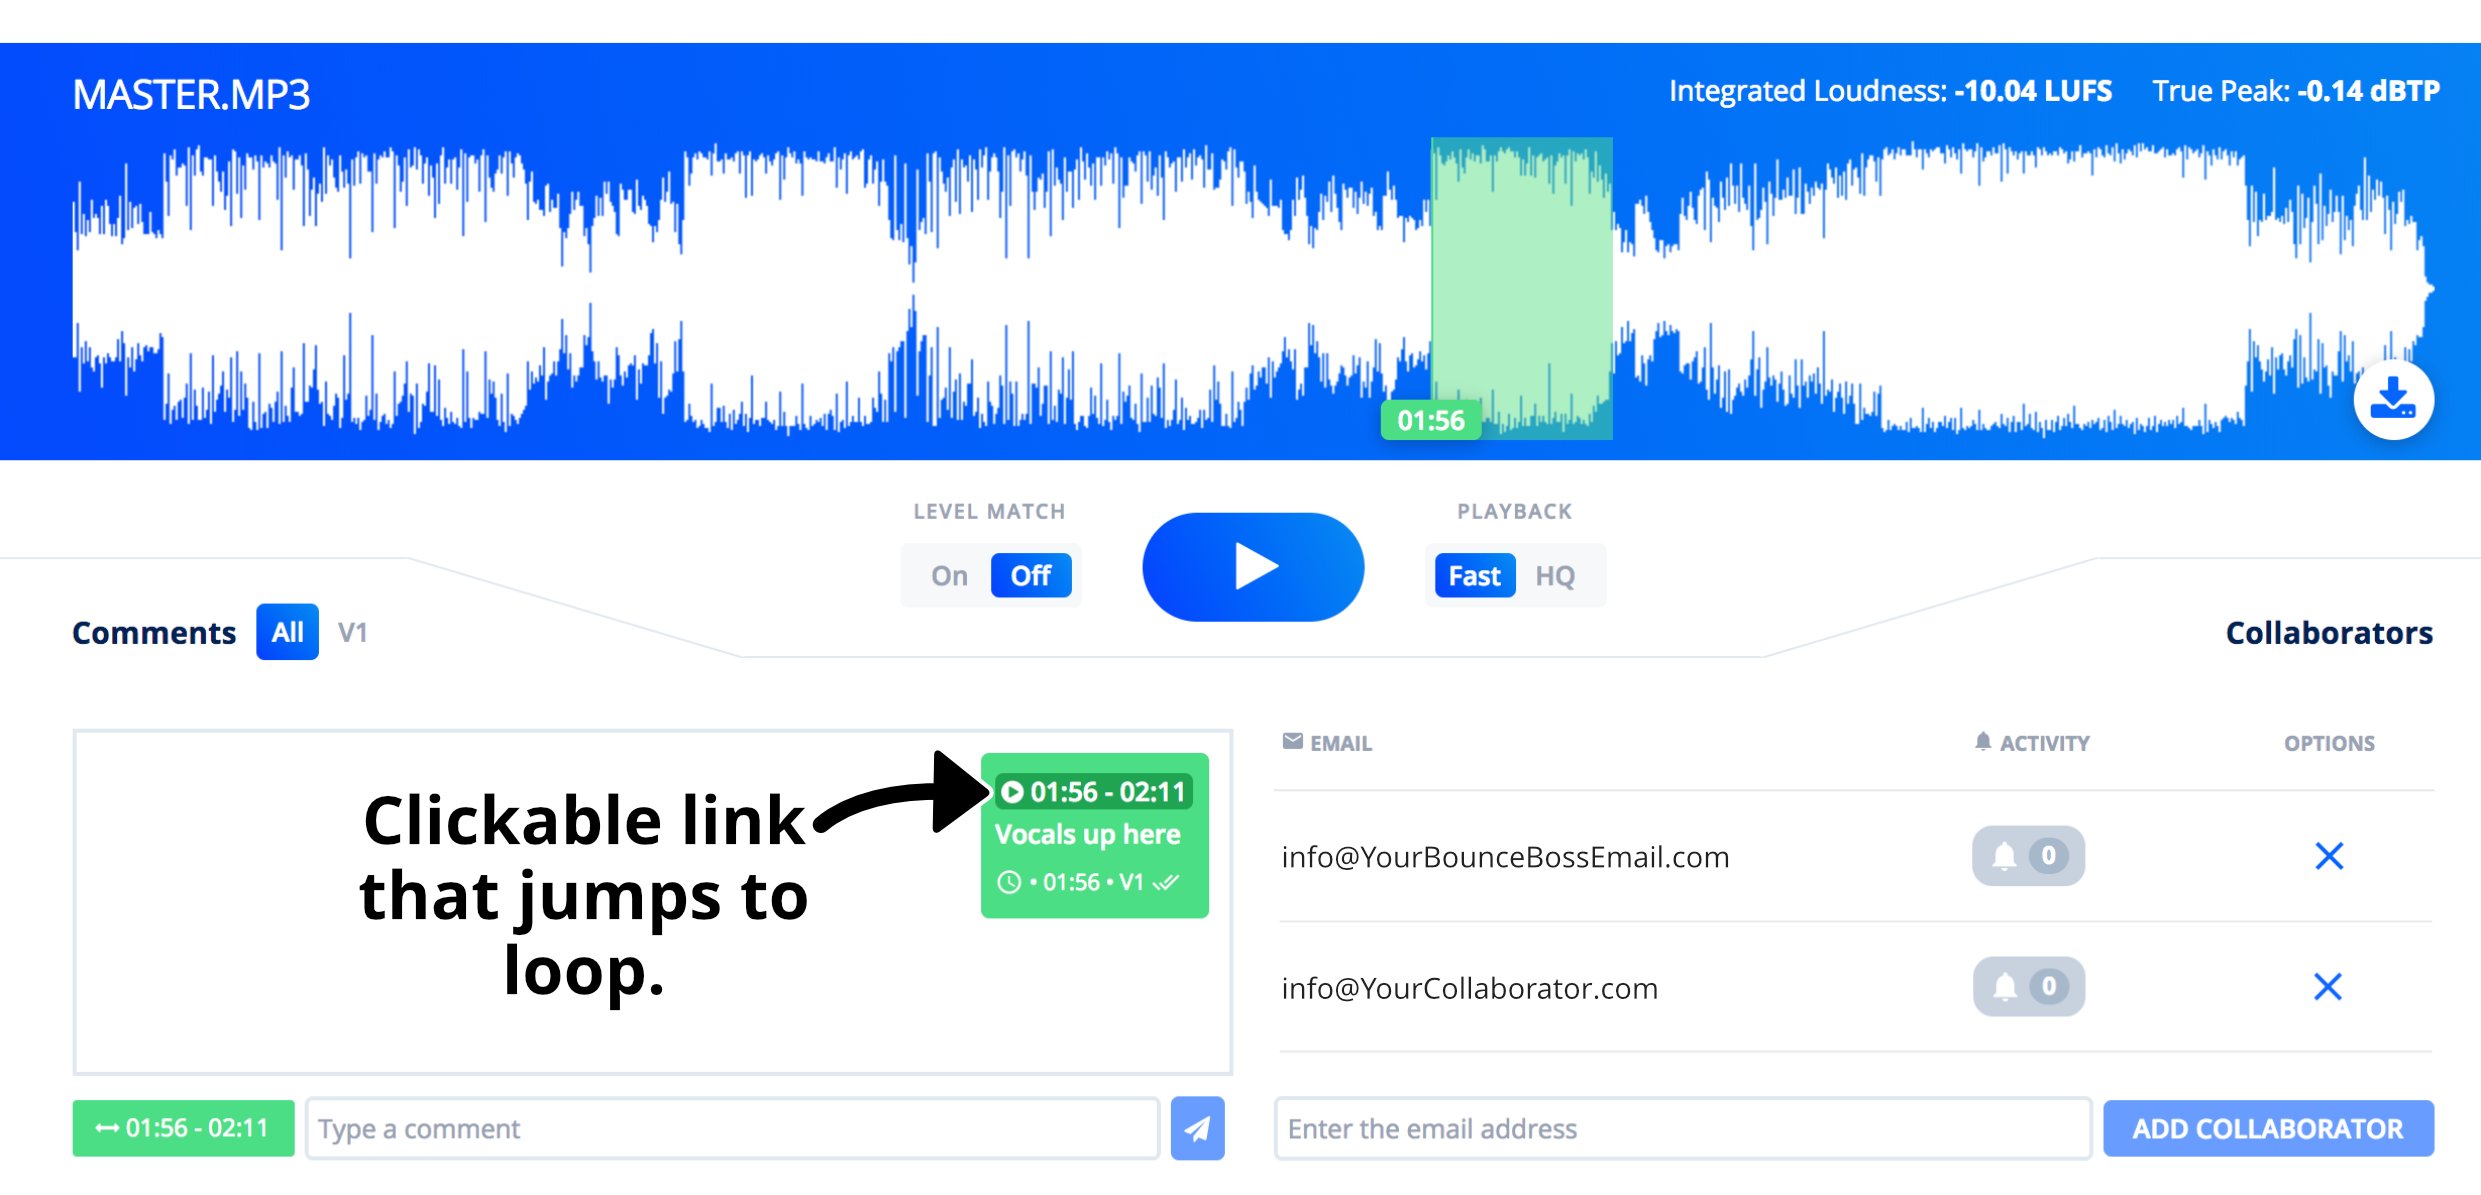
You can add a loop by clicking and dragging the waveform. Each track can have its own individual loop, so you can set up a loop on the chorus of both your latest master and your reference track to see how they compare.
Loops can also be used to specify what a comment relates to. Create your loop, add a comment in the real-time chat window like “Vocals up here”
. Your collaborators will see a link in your comment which will allow them to immediately jump to that loop. This minimizes any confusion and dramatically speeds up the producer’s workflow.
 Pro Tip:
The real-time chat window is pretty smart… You can type times like 01:30 or an area like 01:45-02:15 in your comment and these will become playback links in your posted comment.
Pro Tip:
The real-time chat window is pretty smart… You can type times like 01:30 or an area like 01:45-02:15 in your comment and these will become playback links in your posted comment.
Level Match
The human ear is easily fooled into believing that louder songs have a fuller low-end and more clarity in the high frequencies. You can try this for yourself; listen to the same song at different volumes and you’ll get the feeling that the bass and clarity is improved with an increase in volume. This is just an effect and the true tonal balance is unchanged by volume adjustments.
When working with audio, this is an incredibly important factor to consider. If you have a reference track that has a super-loud integrated loudness measurement of -6 LUFS, and you compare it to your unmastered mix measuring -20 LUFS, it would be a totally unfair comparison. The loud reference would sound amazing and your mix would sound a bit pathetic. With Bounce Boss you can immediately level match all the audio files in your project so your comparisons are fair and objective.
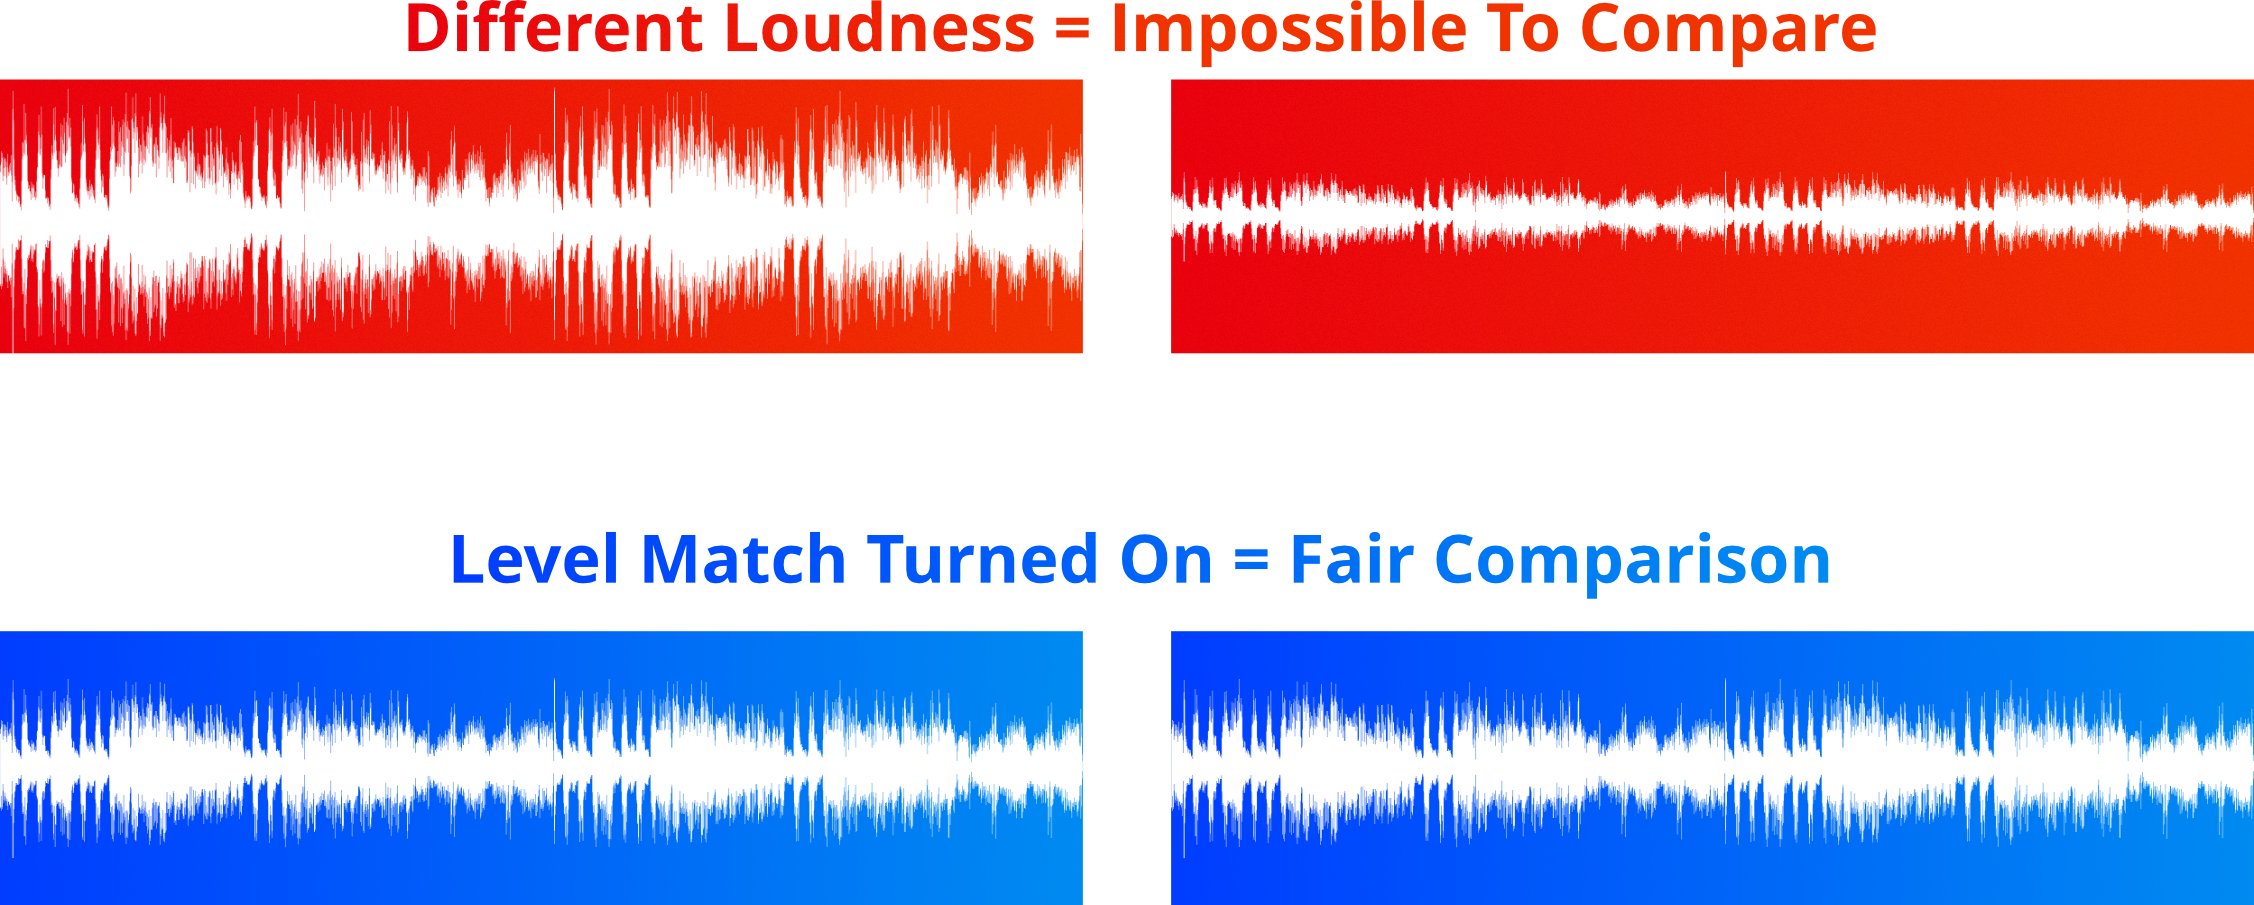
Streaming platforms such as Spotify and YouTube normalize all the audio on their platforms so it plays back at a consistent volume. So if you want your music to be able to hold its own when played back to back with successful tracks on streaming sites, be sure to preview it in Bounce Boss with level match switched on.
Pro Tip: When Level Match is turned on, you can hover your mouse over the Integrated Loudness and True Peak readings to show their ‘Level Matched’ readings
Comments
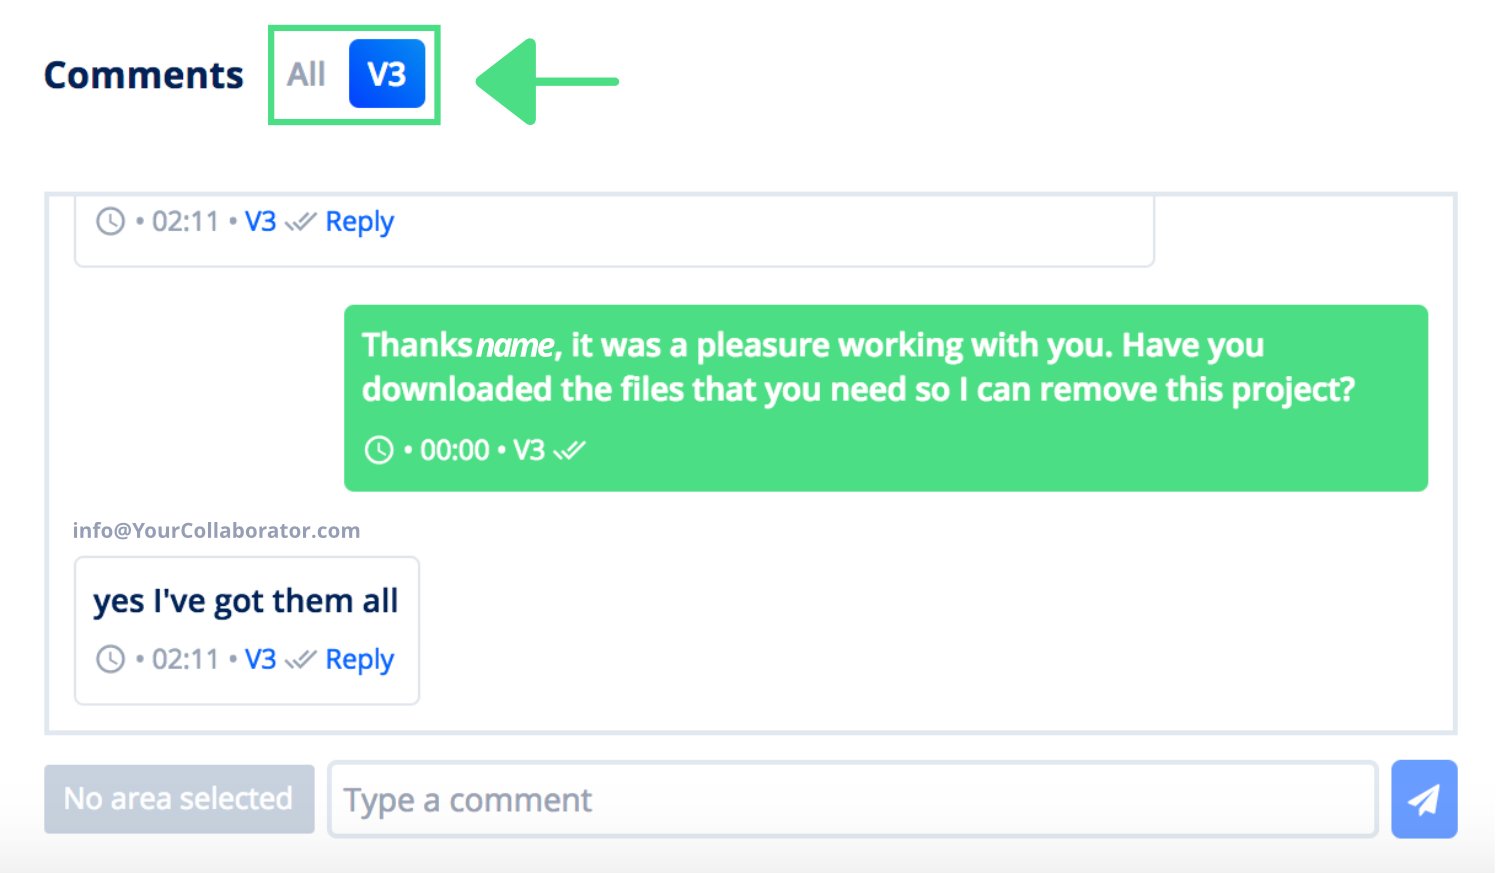
Above the Comments box, you’ll see two buttons. The ‘
All
’ button will display all the comments listed in the project. The other button will correspond to whichever file is selected and displayed by the waveform (R1, M2, V3 etc). When you click that button, you’ll see only the comments relating to the corresponding file. This means you don’t have to rummage through a lot of comments searching for the correct messages.
Uploading More Files To A Project
Bounce Boss helps you keep ALL your project files in one place. You and your collaborators can upload new masters, mixes, stems, and references to a project. Click the ‘Upload Files’ button located above the waveform, drag your files into the box that best describes them (master, mix, stem, or reference) click upload, and Bounce Boss does the rest. Your files will be organized within the project and your collaborators will be notified that new audio files have been added.
Emails That Work
Bounce Boss sends you smart emails. You won’t get hundreds of emails every time a comment is added to a project. You’ll get one email to notify you when new comments are added since your last visit to that project. You’ll get an additional email if your collaborator uploads new tracks. If you’re live chatting using the comments box in the project and you’ve seen the updates then Bounce Boss won’t send you an unnecessary notification email.
My Projects
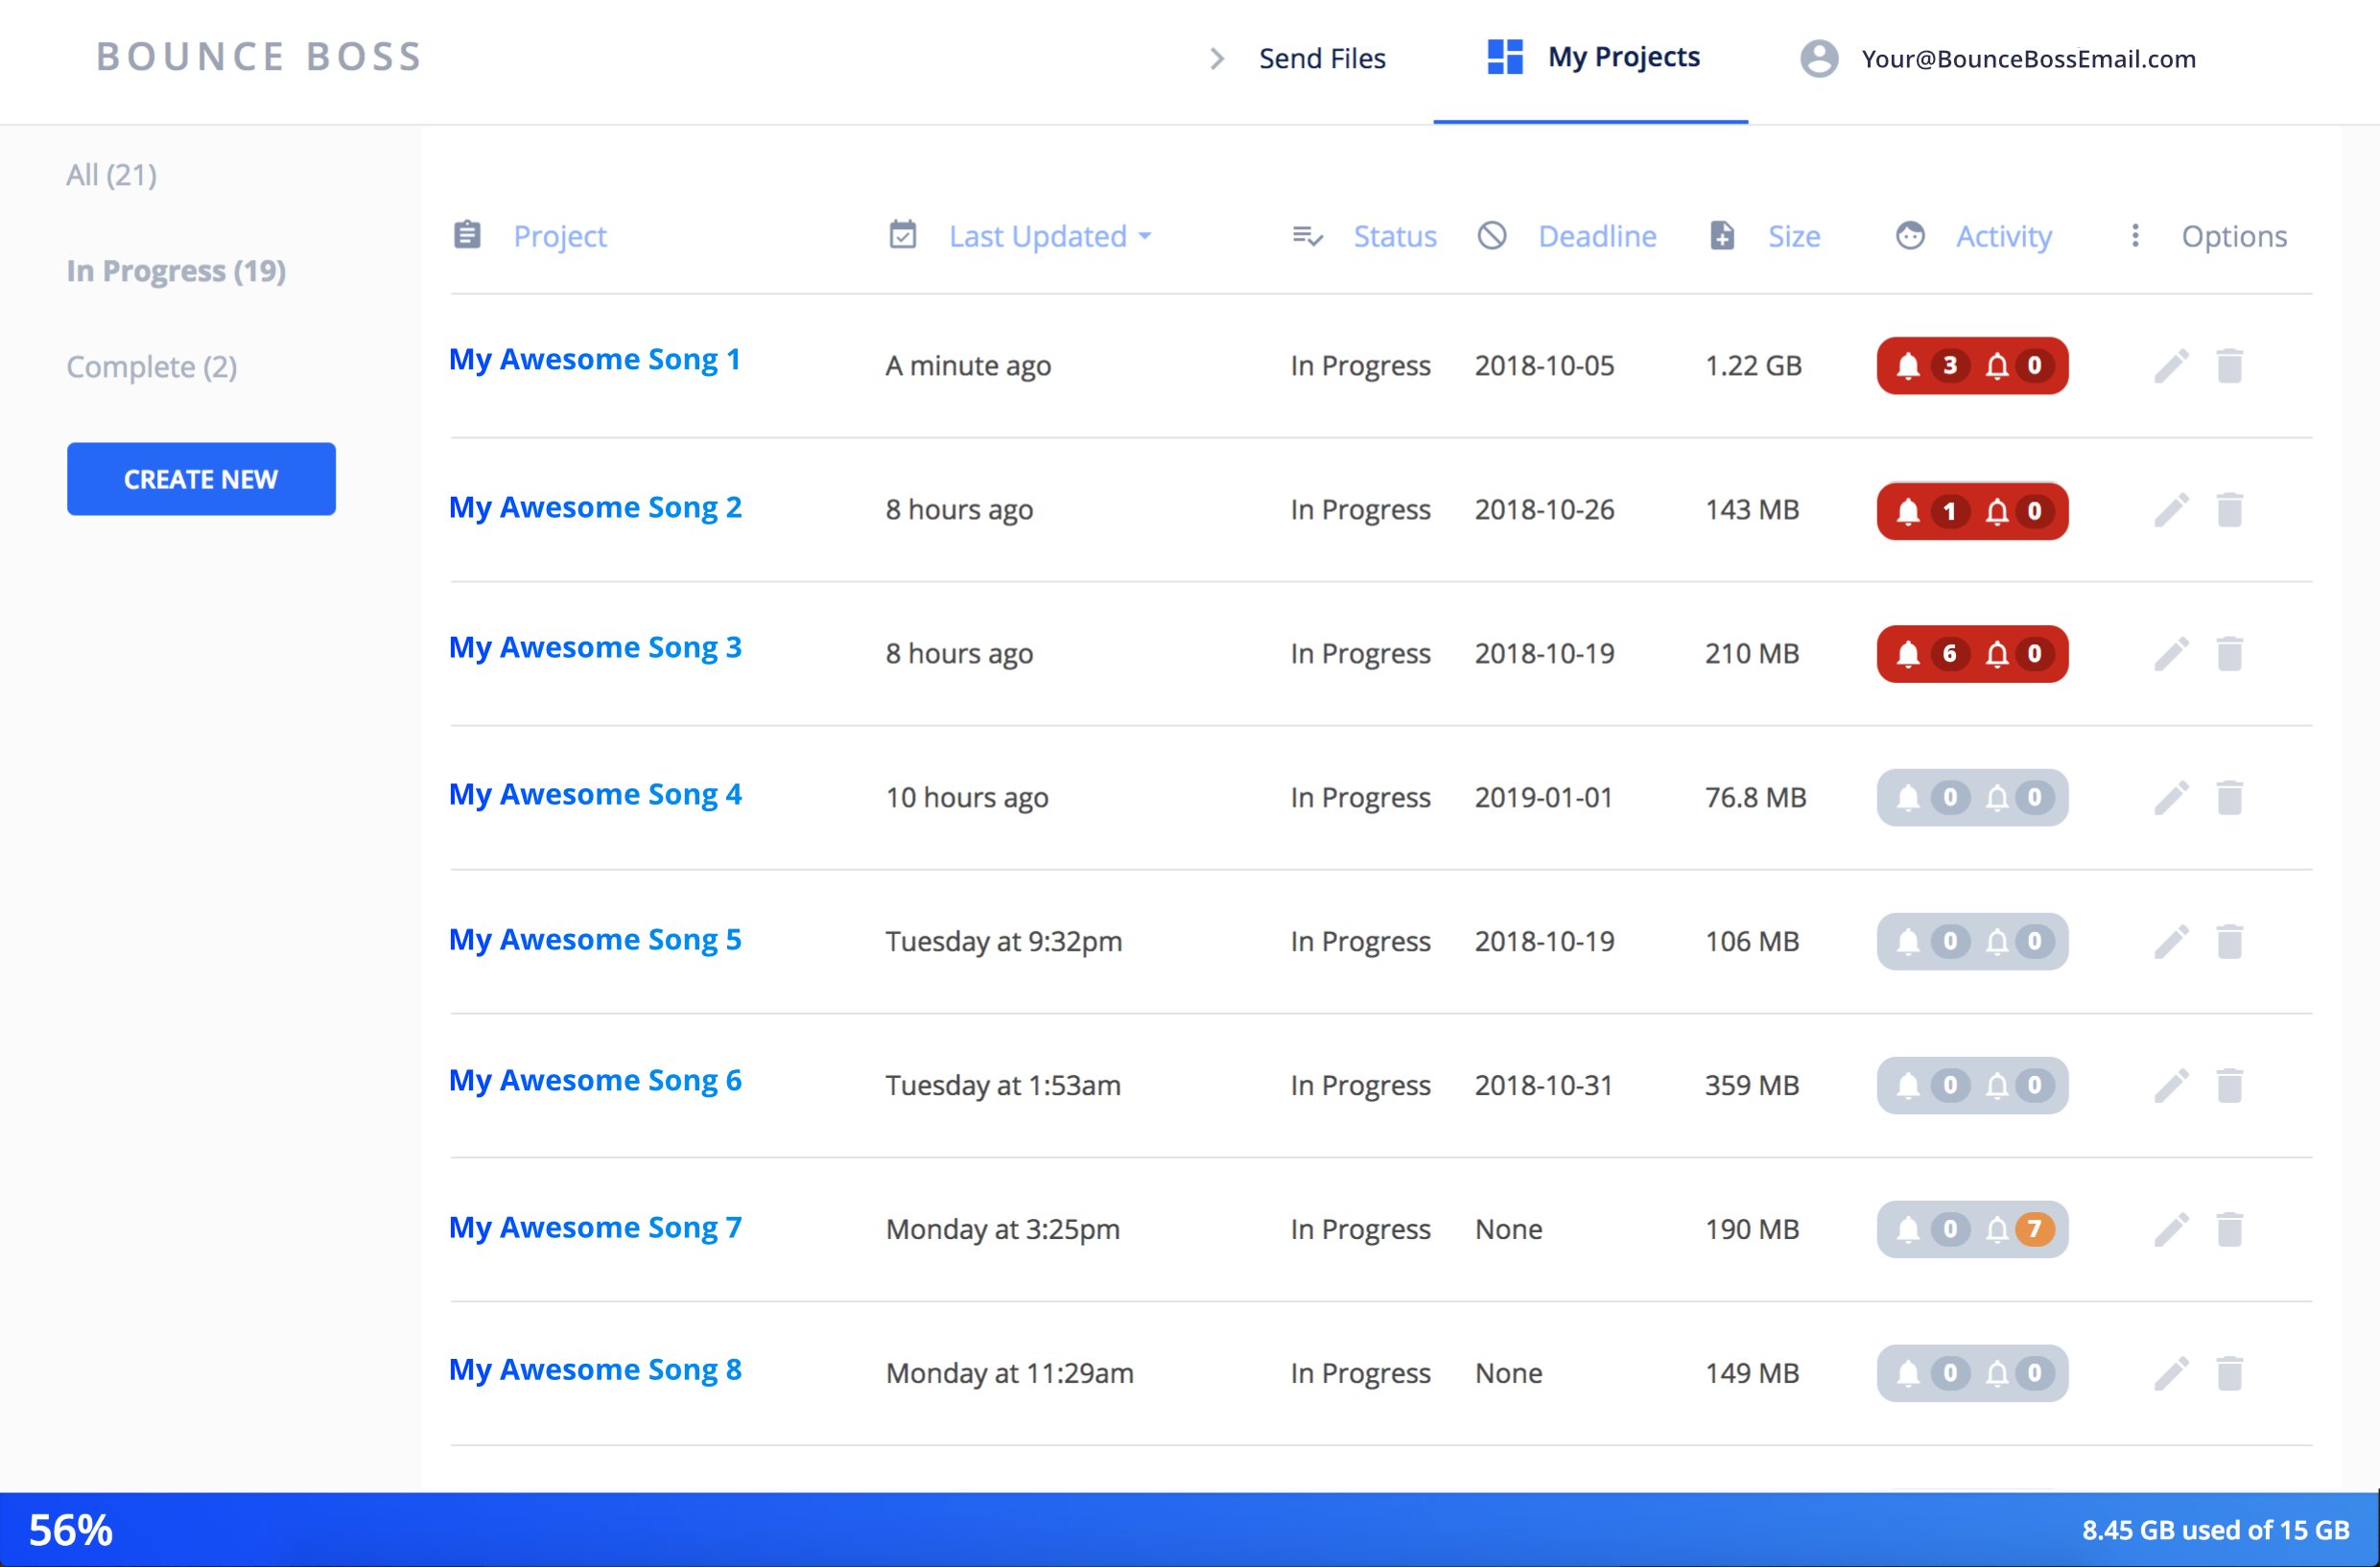
With Bounce Boss you can see an overview of all your projects on a single page.
- The activity counter shows you which projects require your attention.
- You can see which projects have an approaching deadline.
- You can move finished projects into a different folder to keep your work in progress focussed.
- You can see how much storage space you’ve used and easily remove any projects that you don’t need anymore.
With plans starting from just £4 per month
Join other audio and music professionals who are already working smarter with Bounce Boss
No credit card required